Setting the label details
Clicking “Tape settings” in “Settings” in the menu bar opens the Tape settings window.
- Some Tape settings can also be specified in the work window. You can also display the Tape settings window by clicking the “Details” button in Tape settings in the work window.
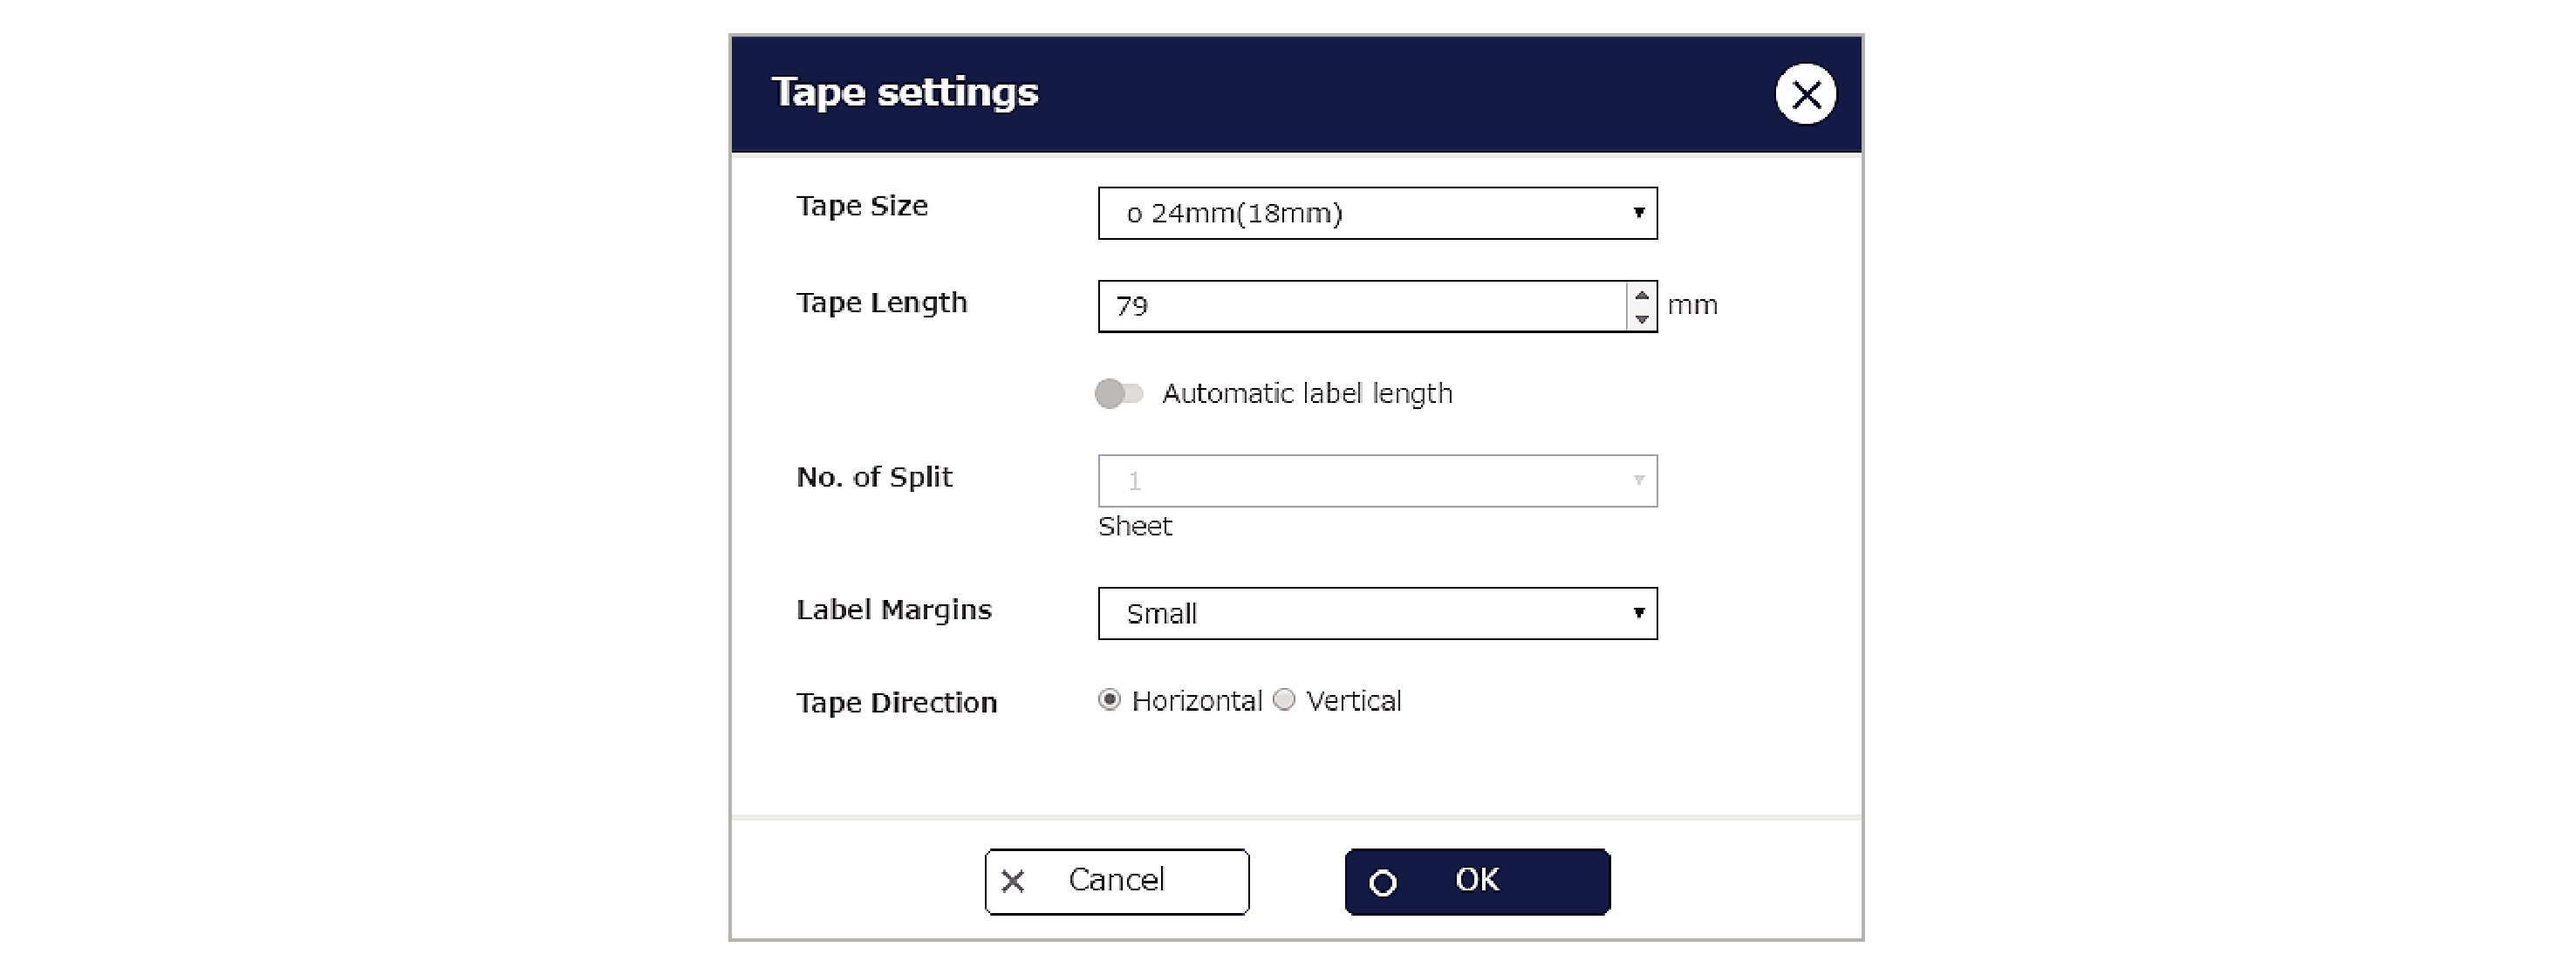
Tape settings parameters
Tape Size:
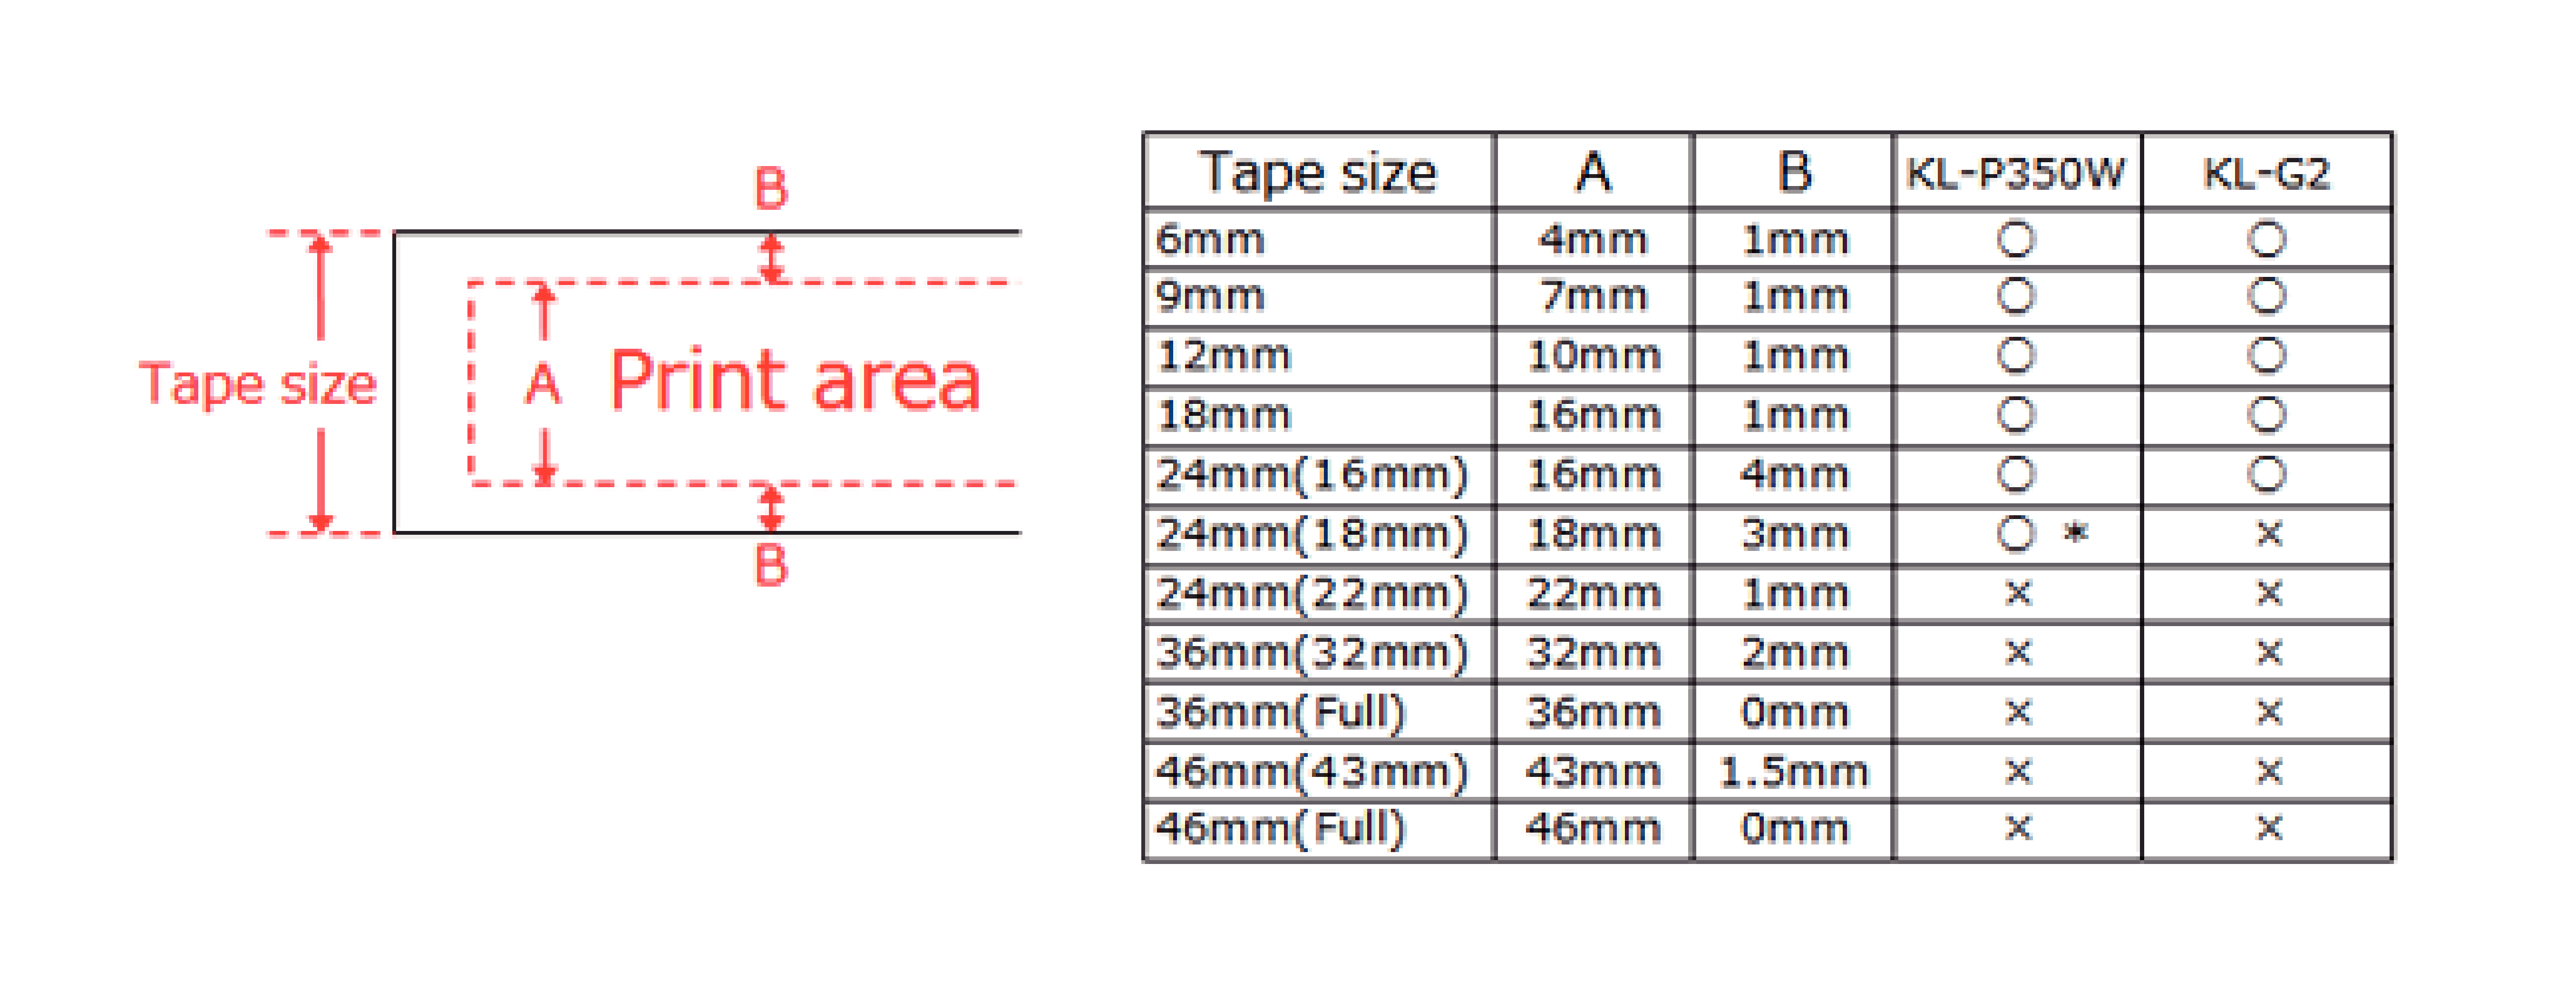
This refers to the label width. The printable widths differ depending on the printer model.
Select a tape size marked with “o”.
(Tape sizes marked with “x” cannot be printed on the selected printer.)
Tape Length:
The length of the label being created. When the “Automatic label length” option is disabled, you can specify lengths of up to 600 mm in 1 mm increments.
Automatic label length:
When this option is enabled, the label length is automatically adjusted to match the part in the layout size.
Disable this option if you do not want to change the label length.
No. of Split:
Specifies the number of split sheets for enlarged printing (creating large labels by pasting together multiple labels).
When the “Tape Size” is “36mm(Full)” or “46mm(Full)” only, you can specify up to 4 split sheets.
Label Margins:
This allows you to set margins before and after a label.
“Small” adds a roughly 3 mm margin before and after.
“Medium” adds a roughly 10 mm margin before and after.
“Large” adds a roughly 20 mm margin before and after.
Tape Direction:
This allows you to specify either horizontal (landscape) or vertical (portrait) as the label direction.
The margins above and below the tape are fixed, as shown below (B).
*When the Print mode is Magnetic Tape, this tape size cannot be used.
 Top of page