Inserting timestamps
-
1.Click the [Timestamp] button in the toolbar, or click “Timestamp” in “Insert” in the menu bar.
-

-
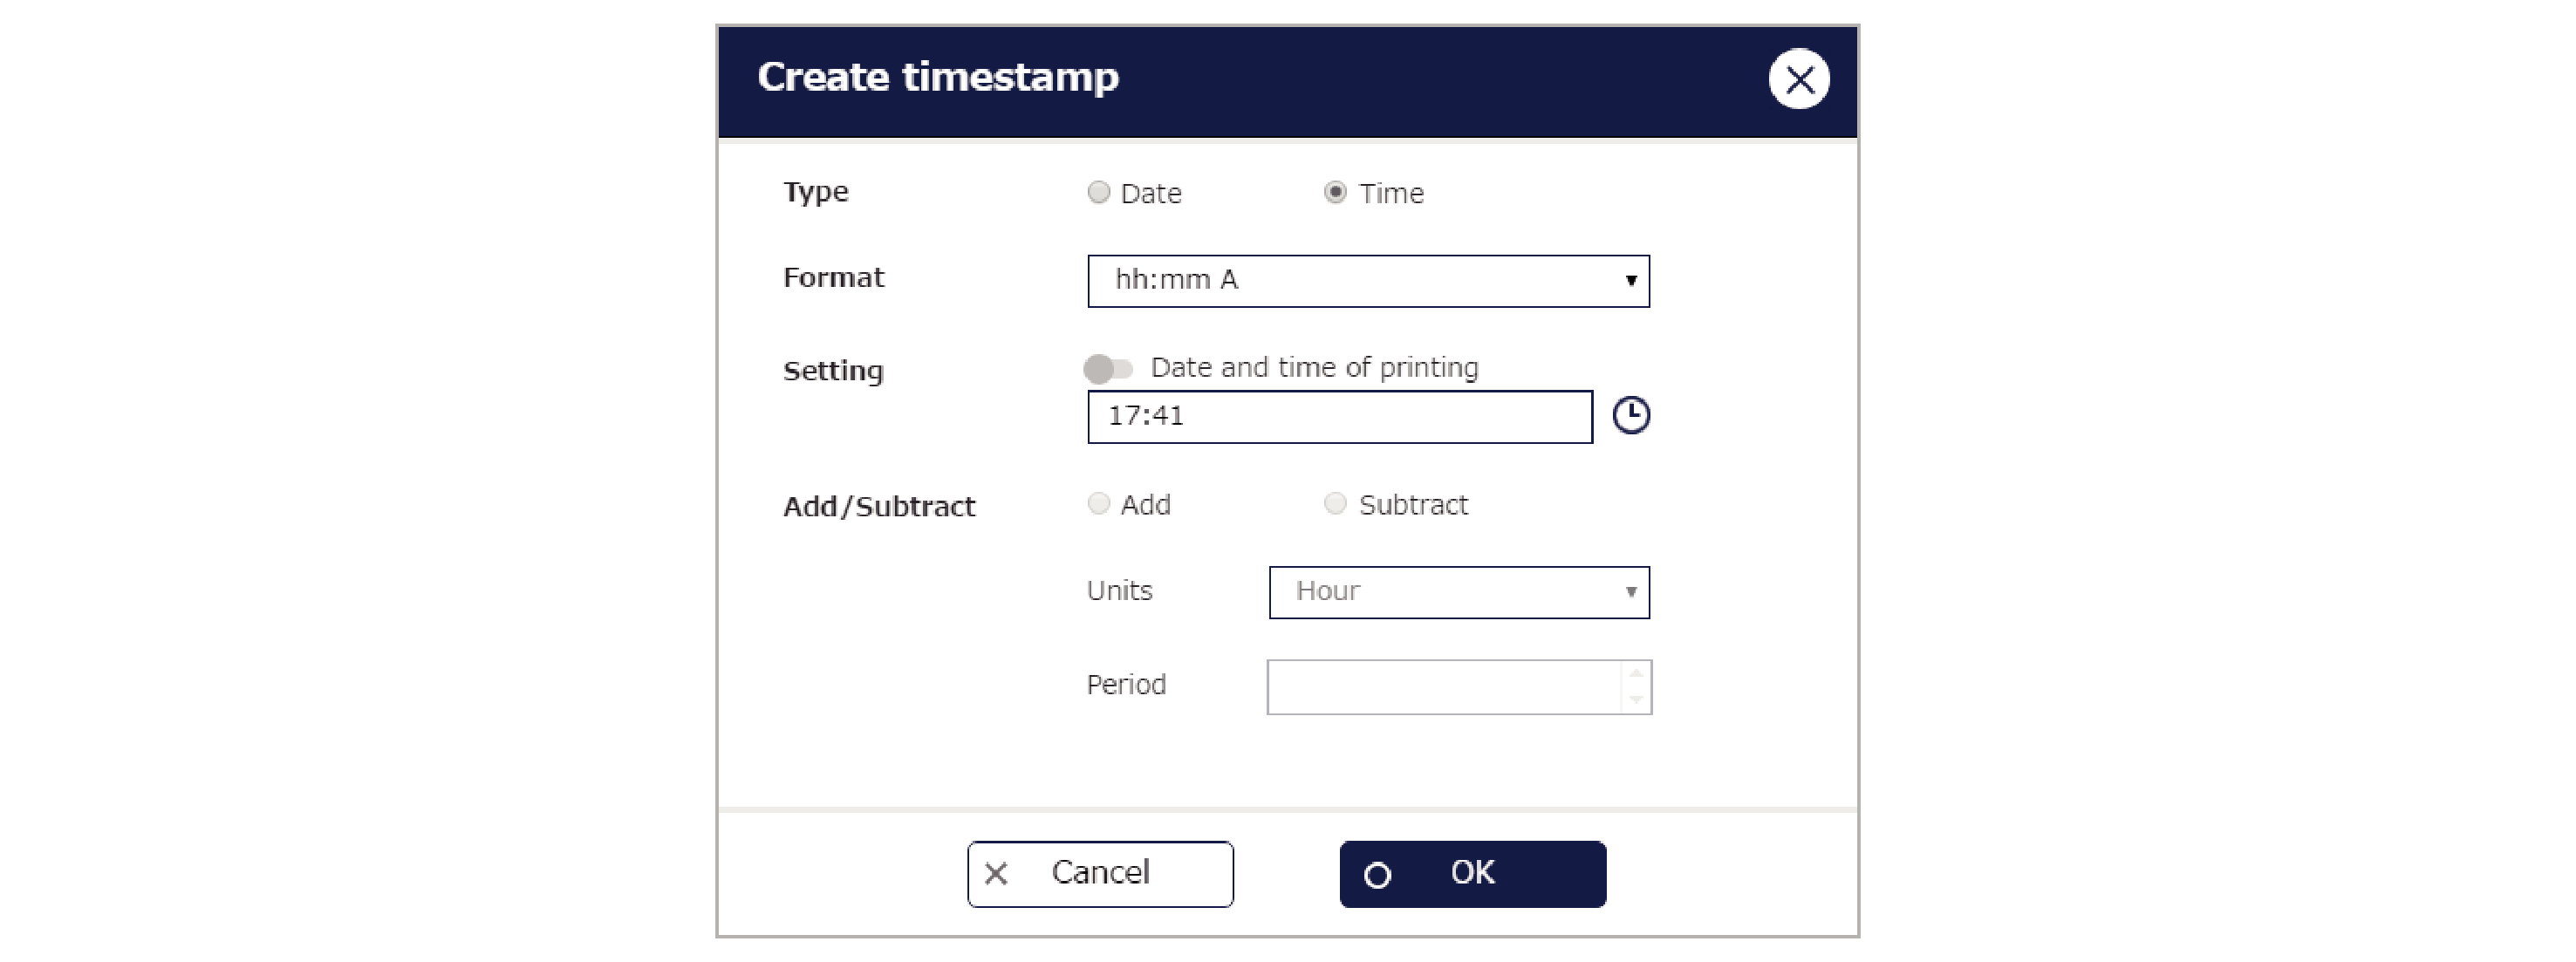
2.The “Create timestamp” window appears.
Set the parameters and click the [OK] button. -
-
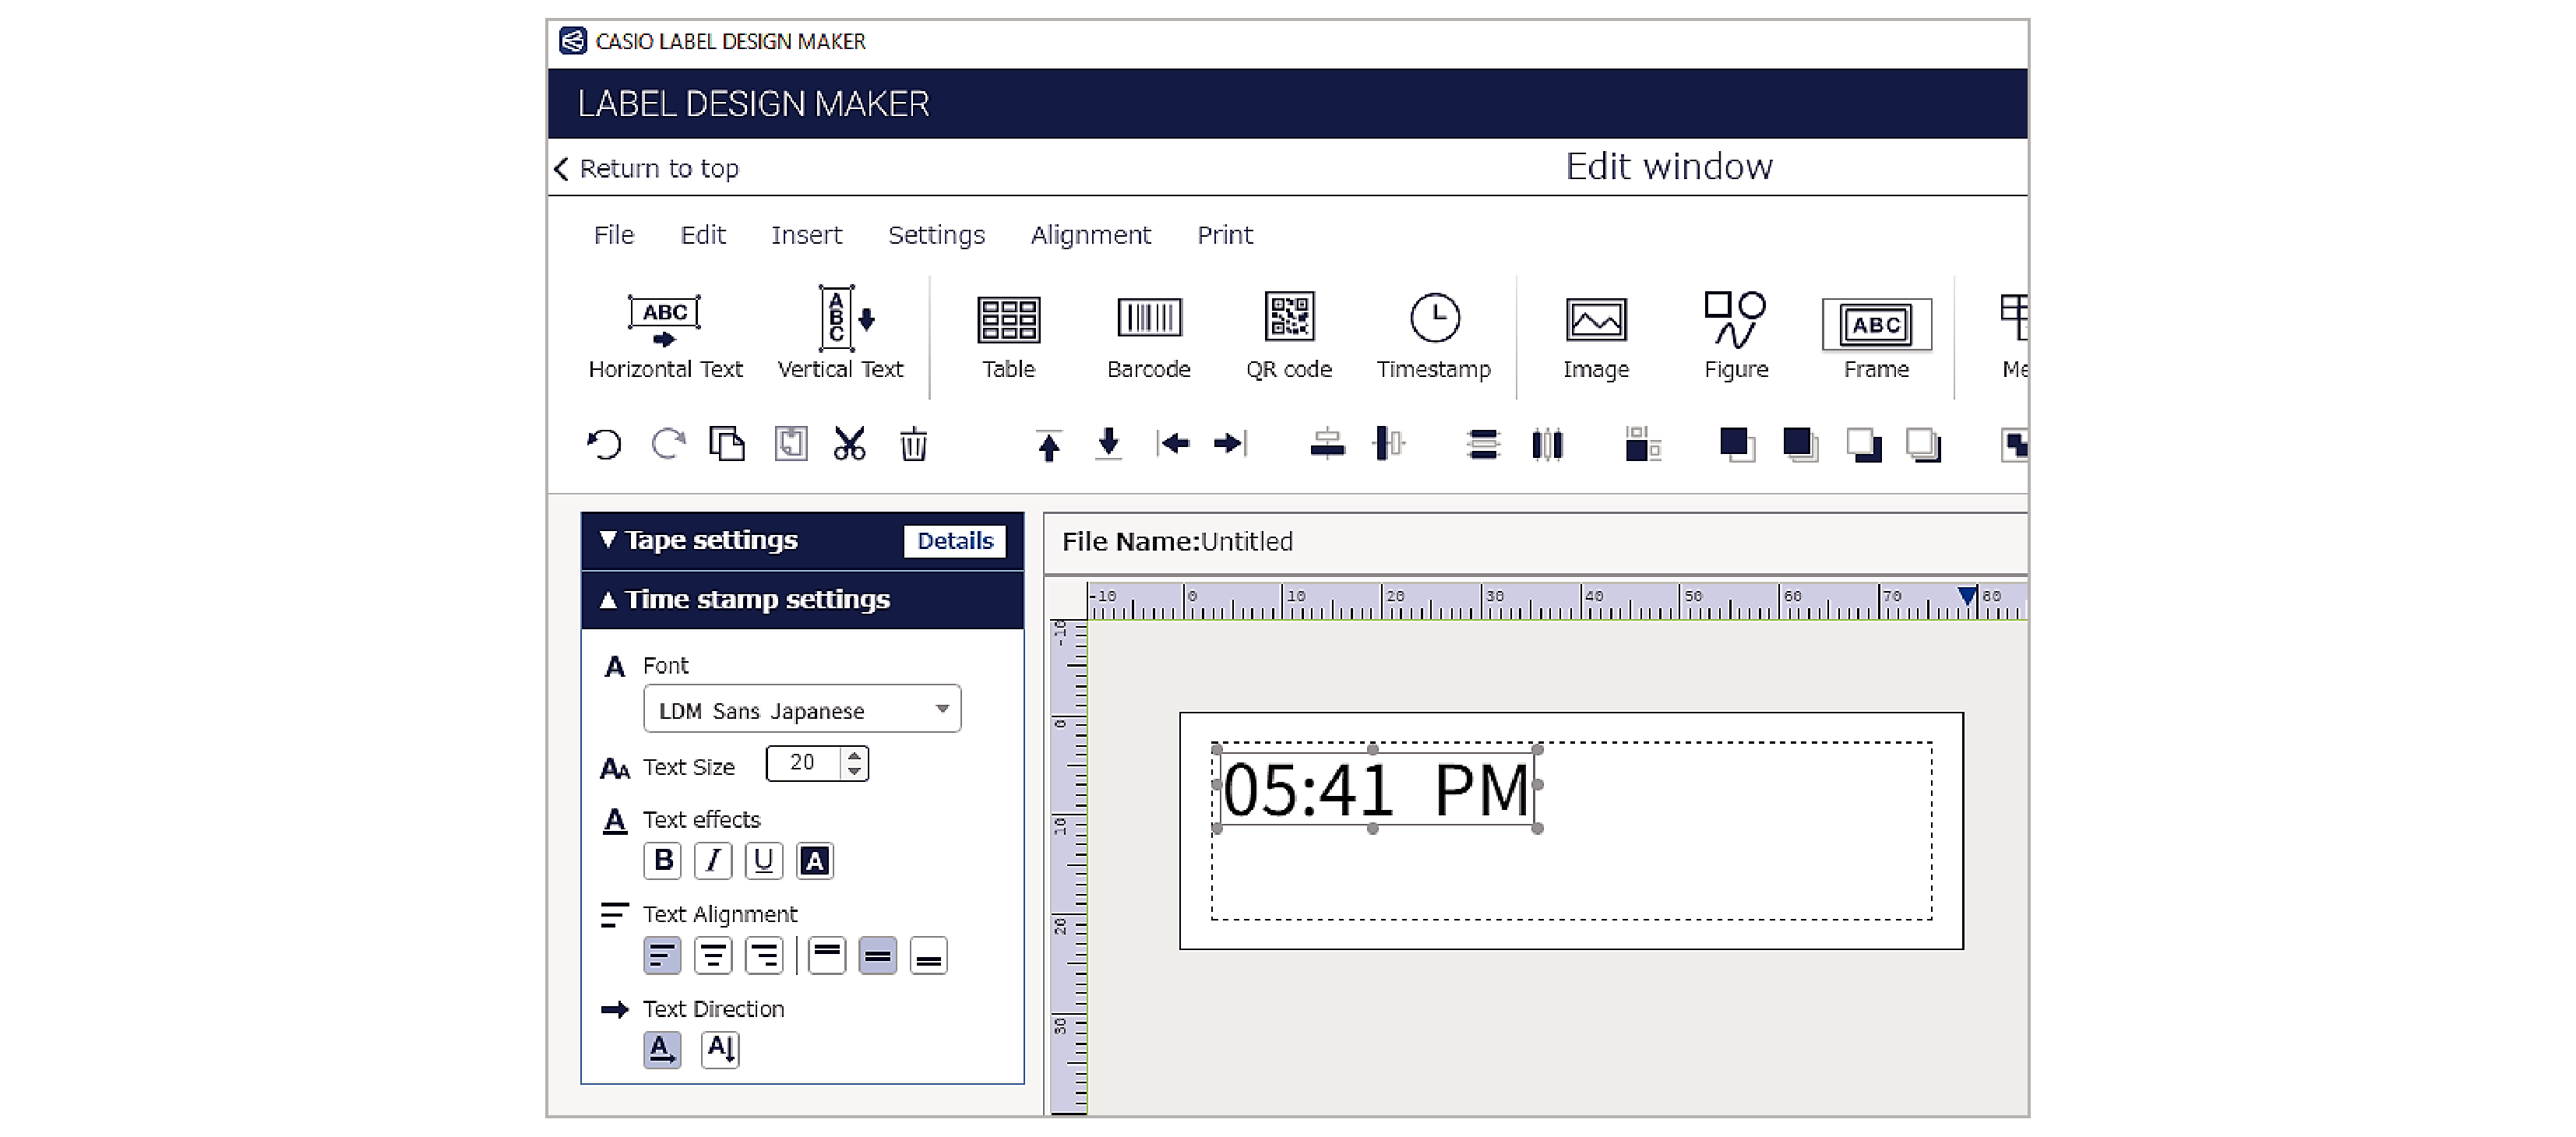
3.Click the location where you want to insert the timestamp.
-
- Double-clicking the inserted timestamp opens the “Create timestamp” window and you can then change the parameter settings.
Timestamp creation parameters
Type:
Select Date or Time.
Format:
Select the format for the entered date and time.
Settings:
Enabling the “Date and time of printing” option applies the date and time current at the time of printing.
Disabling this option allows you to select any date and time.
Add/Subtract:
Allows you to move the date and time forward or back by the specified difference relative to the date and time of printing.
This can be set if the “Date and time of printing” option is enabled.
Units:
Select the units used for moving the date and time backwards and forwards.
Period:
Select the period used as the difference by which the date and time are moved backwards and forwards.
Time stamp setting parameters
When a timestamp is selected, “Time stamp settings” appears in the work window.

Font:
Selects the text font (typeface).
Text size:
Specifies the text size in points.
Text effects:
Specifies bold, italic, underscore or color reversal (white).
Text Alignment:
Sets the position of the text in a box.
 Top of page