Printing
-
1.Click the [Print] button in the toolbar, or click “Print” in “Print” in the menu bar.
-

-
2.When the Print Preview window appears, set the various parameters and click the [OK] button.
-
- Some parameters may not be available on some models.

Print Preview parameters

Printer Name:
The name of the destination printer is displayed. This can also be changed.
USB/WLAN:
Select one or the other as the connection method. (This cannot be changed on printers that are not WLAN-compatible.)
Tape color:
When you select the tape color, that color appears in the print preview so you can check the image.
(Depending on your model and the tape size, some colors may not be supported.)
Tape Size:
The tape size currently selected in the Edit window is displayed.
Tape sizes marked with “x” cannot be printed on the selected printer.
Scaled printing:
To use scaled printing, select the tape size. Scaled printing
Tape sizes marked with “x” cannot be printed on the selected printer.
Export to PNG:
Allows you to export files as PNG-format images. Exporting to PNG
No. of Copies:
Enter the number of copies to be printed. When numbering is used, this is the number of consecutive pages printed. Using numbering
Back/Next:
Use these to switch between previews when printing multiple sheets.
Properties:
Opens the Properties window.
Monochrome:
Opens the Monochrome window.
Properties parameters
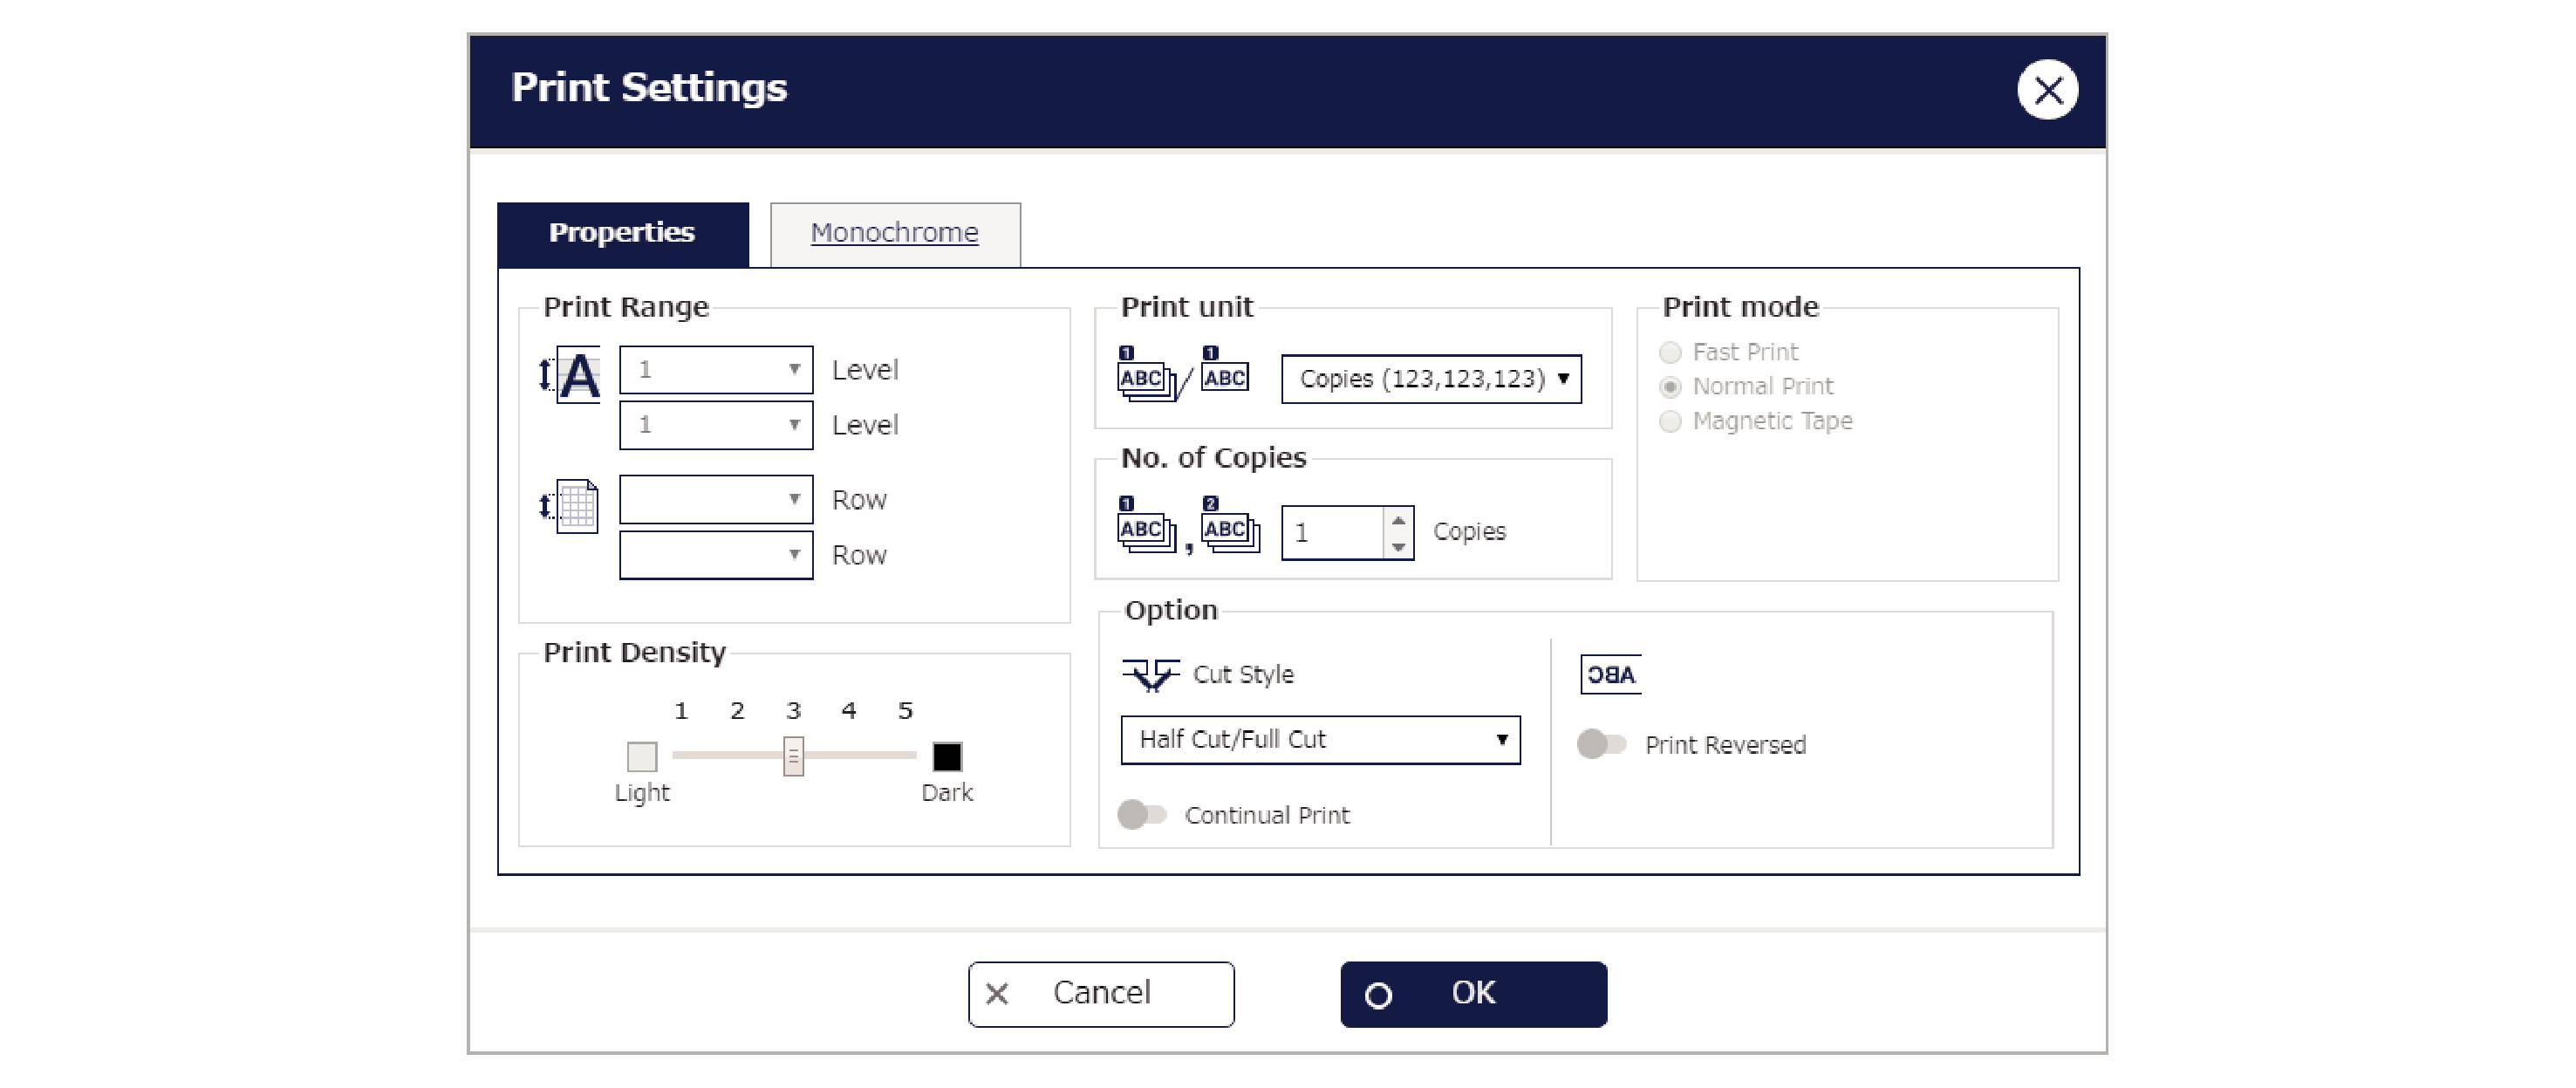
__Level:
Specify the print area for enlarged printing.
__Row:
Specify the print area for merged printing. Creating label sequences (merging)
Print Density:
Specify the density for printing.
Print unit:
Select either copies or pages as the printing sequence when printing multiple copies.
No. of Copies:
Enter the number of copies to be printed. When numbering is used, this is the number of consecutive pages printed. Using numbering
Print mode:
Select the print mode. For ordinary printing, leave the “Normal Print” mode selected. To prioritize printing speed over print density when printing, select “Fast Print”. When printing on magnetic tape, select “Magnetic Tape”. (The tape is not cut automatically in “Magnetic Tape” mode.)
Cut Style:
Select the method used for cutting the tape.
Continual Print:
Enable this option to save tape when printing consecutive but separate jobs.
Print Reversed:
Enable this option to print reversed.
Monochrome parameters
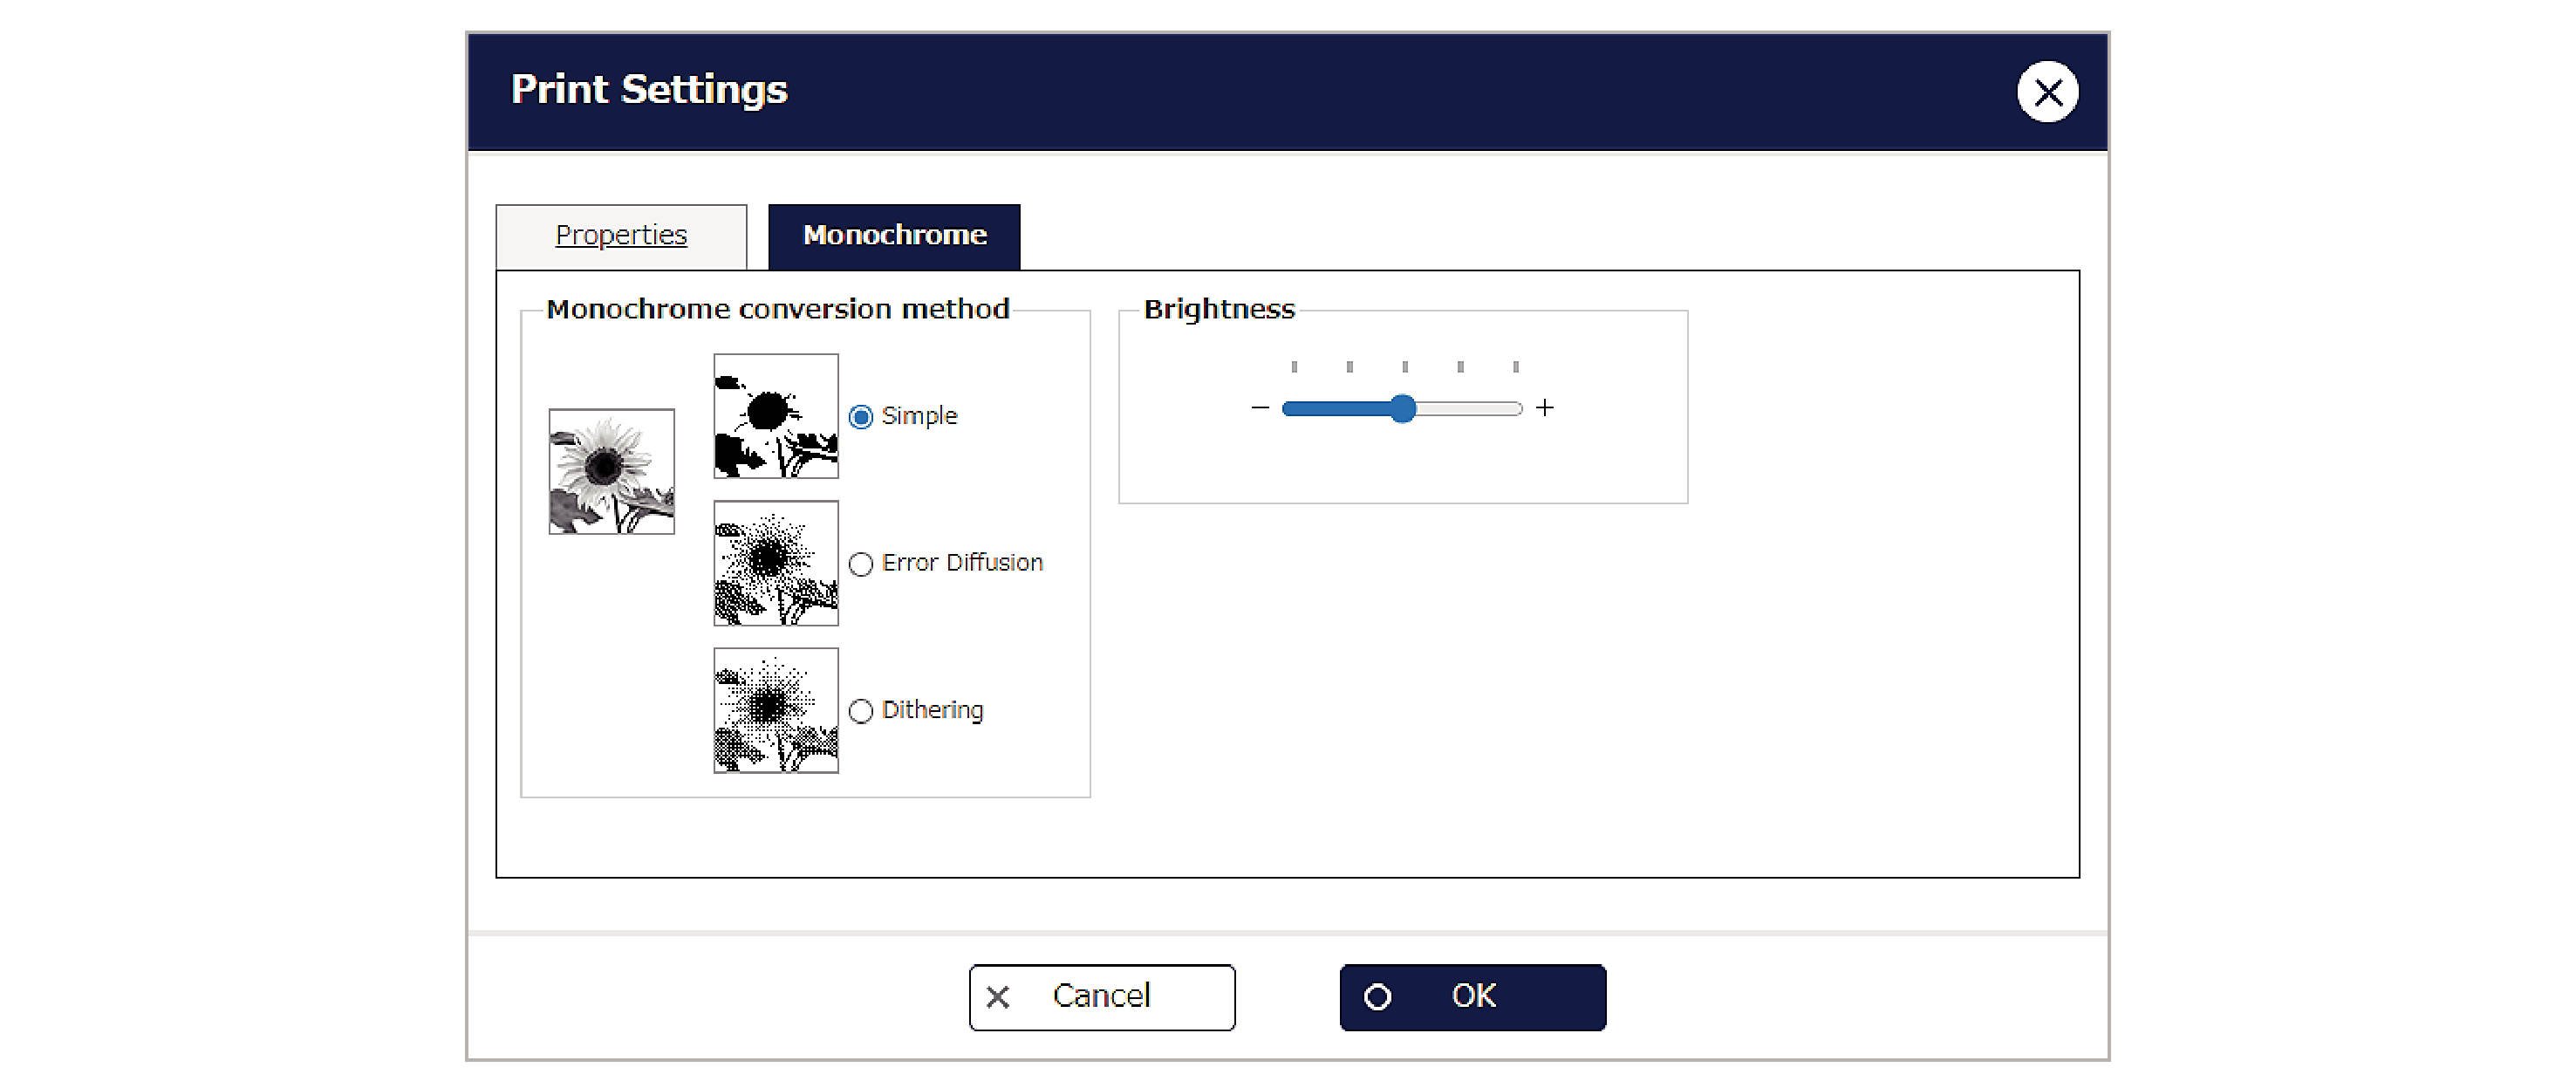
Dithering:
Select “Simple”, “Error Diffusion”, or “Dithering” as the monochrome conversion method for color images.
Brightness:
Allows you to adjust the brightness.
 Top of page